Are you looking for a tutorial guide about how to make a verification system on Discord 2022? Well, keep reading till the end, as we are going to share the easiest method to make “react to verify Discord bot” in the step-by-step guide.
There are a bunch of different Discord verification bots available online. But the best verification bot on Discord is the Carl-bot. You can also use the Carlbot for creating Discord hyperlinks.
Today, you are going to learn How to Make a Verification System on Discord with the carl bot in a bunch of easy steps. Let’s get straight into the tutorial.
How to Make a Verification System on Discord 2022?

Before we learn How do you make a verification system on discord with Carl? There are a few things you need to take care of. Below are the settings and features your Discord server must be set up with.
- Developer Mode Enabled
- Carl-Bot Added
Developer mode must be enabled in your server as after that you can easily copy any message-id from the chat which is necessary if you want to create a verification system on Discord.
You can easily enable your developer mode by heading over to App Settings > Advanced > Developer Mode and toggle the button to enable it.
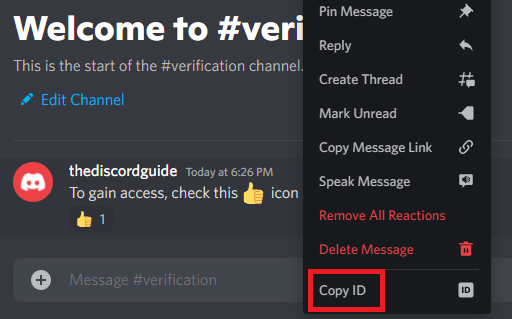
Once it is enabled, you can go into the text channel and right-click on any message to see if the “Copy ID” option appears or not, if you get the option, it means you have successfully enabled the Developer mode.
To add Carl-bot to your server, simply go to the Carl-bot website & authorize your account and add the bot to your desired servers from the list.
How to Make a Verification System on Discord with Carl bot?
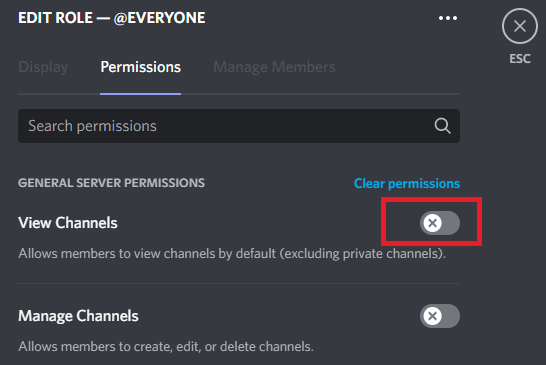
1. Go to Server Settings > Roles & turn off “View Channels” permission for the @everyone role.
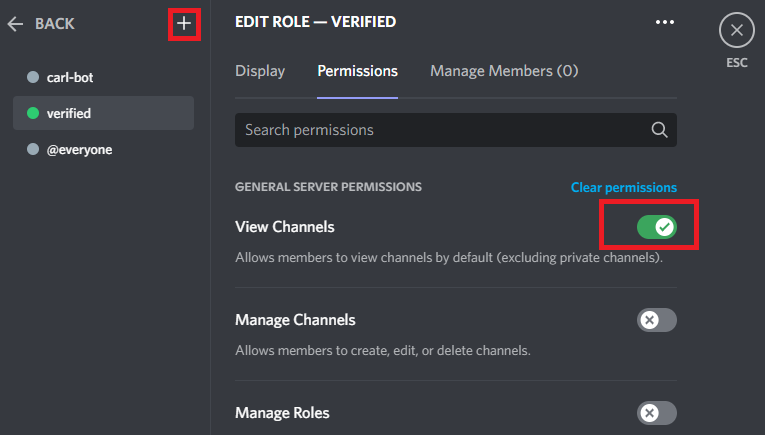
2. Click on the “+” icon to create a new role & name it “Verified” & make sure that “View Channels” permission must remain on for this verified role.
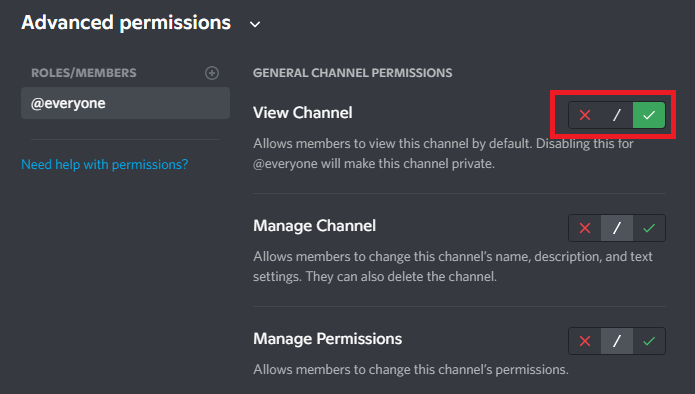
3. Create a new text channel & name it “Verification”. Go to the Channel Settings > Permissions & turn on “View Channels” permission for the @everyone role.
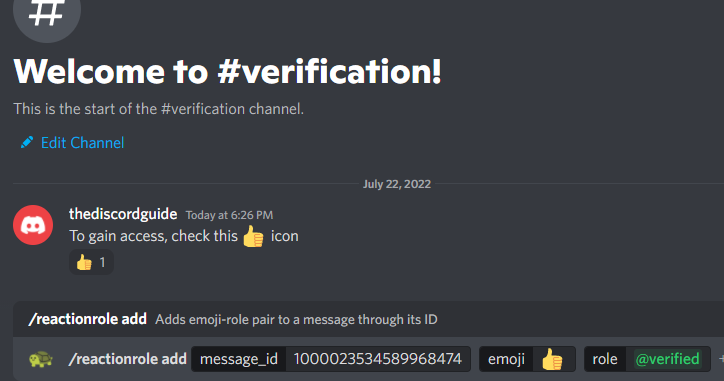
4. Type a verification message like, “To gain access to the server, check this mark” & copy the message ID.
5.. Type “/reaction” in the “Verification” text channel and click on Carl-bot’s “/reactionrole add” button.
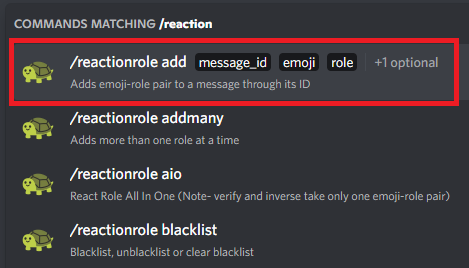
6. Simply, paste the message ID into the box, add the emoji you want as a verification mark & choose the role as @verified.
And you’re done, now whoever joins your discord server, they’ll be only able to see the “Verification” text channel until they complete the verification process by checking your verification mark.
Carlbot is definitely the best verification bot Discord. It easily lets you create and set up a verification system on your Discord to fight back spammers and unnecessary bots from hijacking your server.
By using this method, you can easily set up a Discord emoji verification system for your server. I highly recommend you set up a verification system on your server if you haven’t yet, it really helps to protect your server.
Here’s a quick video tutorial of the same method below. For your convenience, follow the video steps to easily create a verification system for your Discord server.
Conclusion
If you want to test whether or not the verification system is working properly, you can do it by entering your server from any other account or you can simply go to Server Settings > Roles & choose “View Server as Role” to look at your server as @everyone role & @verified role.
This was a pretty basic Discord emoji verification system guide. If you want to know How do I make advanced verification discord? Let us know in the comments, we’ll bring our guide on the same too.
I hope this guide was useful for you to learn How to Make a Verification System on Discord 2022? If you are facing any issues, drop us a comment. For more amazing Discord content, subscribe to The Discord Guide!
Hey Folks, I am Dustin Anderson. I’m a very passionate tech enthusiast who loves experimenting with cool gadgets and software on the computer. On this blog, I majorly write informative & in-depth Discord Tips, Tricks & Tutorial Guides.